Object detection with Raspberry Pi and Python

Anastasiia Dolgaryeva
Delivery Manager
Today we will discuss how to build a simple and cheap mobile object detector.
The purpose of this research is to determine if an object detection model on a cheap mobile device can be used for real-world tasks.
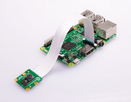
As a mobile platform, we use a Raspberry Pi 3 Model B. Raspberry Pi is a 35$ single-board computer, which means that the microprocessor, memory, wireless radios, and ports are all on one circuit board. The Pi is a Linux computer, so technically, it can do everything a Linux computer can do, such as running email and Web servers, acting as network storage, or being used for OBJECT DETECTION. Unlike most computers with a built-in hard drive or SSD storage options, the Pi’s OS is installed onto a microSD card, which is also where you’ll put all your files since the board doesn’t include any built-in storage (you can always add a USB hard drive, though). This structure makes it easy for you to expand the storage and switch between different operating systems by swapping out microSD cards.
As the hardware part of our object detector, we used a Raspberry Pi 3 Model B and a Raspberry Pi Camera V2. We need Raspbian Stretch 9 installed since TensorFlow 1.9 officially supports the Raspberry Pi if you are running Raspbian 9. We also need a microSD card with at least 16 Gb of memory because building OpenCV can be a very memory-hungry procedure.
Object Detection Models
For our experiment, we chose the following models: tiny YOLO and SSD MobileNet lite.
You only look once (YOLO) is a state-of-the-art, real-time object detection system implemented on Darknet. Prior detection systems repurpose classifiers or localizers to perform detection. They apply the model to an image at multiple locations and scales. High-scoring regions of the image are considered detections. This model has several advantages over classifier-based systems. It looks at the whole image at test time, so its predictions are informed by a global context in the image. It also makes predictions with a single network evaluation, unlike systems like R-CNN, which require thousands for a single image.
To carry out the detection, the image is divided into an SxS grid (left image). Each of the cells will predict N possible “bounding boxes” and the level of certainty (or probability) of each one of them (image at the center). This means SxSxN boxes are calculated. The vast majority of these boxes will have a very low probability. That’s why the algorithm proceeds to delete the boxes that are below a certain threshold of minimum probability. The remaining boxes are passed through a “non-max suppression” that will eliminate possible duplicate detections and thus only leave the most precise of them (image on the right).
SSD (Single Shot MultiBox Detector) is a popular algorithm in object detection. SSD speeds up the process by eliminating the need for a region proposal network. To recover the drop in accuracy, SSD applies a few improvements, including multi-scale features and default boxes. These improvements allow SSD to match the Faster R-CNN’s accuracy using lower-resolution images, further improving the speed. SSD with MobileNe is an object detection model optimized for inference on mobile devices.
The key idea here is a single network (for speed) and no need for region proposals. Instead, it uses different bounding boxes and adjusts the bounding box as part of the prediction. Different bounding box predictions are achieved by each of the last few layers of the network responsible for predictions for progressively smaller bounding box and the final prediction is a union of all these predictions.
To perform object detection, we used OpenCV, Tensorflow Object Detection API and Darkflow. TensorFlow’s Object Detection API is a very powerful tool that can quickly enable anyone (especially those with no real machine learning background) to build and deploy powerful image recognition software. The API provides end-users instruments for training and running detection models and models trained on COCO dataset like Faster-RCNN, SSD Mobile and etc. Since YOLO is implemented on a C++-based framework for deep learning called Darknet we use a translation of Darknet to TensorFlow called Darkflow.
Environment setup
Next, we’ll set up the environment.
The first thing is installing OpenCV on a Raspberry Pi 3 with all the dependencies. You can find a good guide here.
The next step is to set up and enable the camera. We also need to install a python module called picamera[array]. The module provides an interface to represent images from the camera as NumPy arrays. Here is another good guide for this purpose.
As mentioned above, TF 1.9+ officially supports Raspberry Pi. But it doesn’t mean that we can just install it using pip. Pip installs only the 0.11.0 version, which does not satisfy the requirements for the object detection API. We should build Tensorflow from the source code. But building on the Raspberry Pi is not recommended because of the slow processor and limited RAM. It takes a lot of time. It’s easier to build a TensorFlow .whl package on a more powerful host machine and install it on Raspberry. We can use the official guide to build the package or download an already-built package. After that, copy the wheel file to the Raspberry Pi and install it with pip:
Pip install [file_name].whl
Next, we need to set up the environment for YOLO. YOLO is implemented in a C-based framework for deep learning called Darknet. To avoid building Darknet on a Raspberry Pi, we used Darkflow. Darkflow is the translation of Darknet to TensorFlow. Darkflow is easy to install with instructions from the official repository. Also, we used YOLO’s pre-trained weights tiny-yolo-voc.weights from the authors of Darkflow and network config tiny-yolo-voc.cfg from Darkflow source repository.
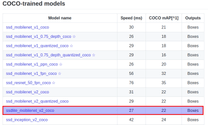
Now, we need to download the MobileNet SSDLite model from the TensorFlow detection model zoo. The model zoo is Google’s collection of pre-trained object detection models that have various levels of processing speed and accuracy. The Raspberry Pi has a weak processor and limited RAM, so we need to use a model with less processing power. Though the model runs faster, it comes at a tradeoff of having lower accuracy. We tried to use the SSD MobileNet model, but during the loading model graph, it throws a memory allocation exception. Raspberry Pi doesn’t have the required amount of memory for this task. Then, download the SSDLite-MobileNet model and unpack it. We will need only the frozen_inference_graph.pb file.
Some code
First, define an abstract class for detectors:
from abc import ABC, abstractmethod

class ObjectDetector(ABC):
@abstractmethod
def detect(self, frame, threshold=0.0):
Pass
Next, implement the interface for SSD and YOLO models. For SSD, we used code from the object detection API. And YOLO object detector is just a wrapper around Darkflow TFNet class.
Now let’s implement a detection script. The first step is to initialize the camera:
# initialize the camera and grab a reference to the raw camera capture
    camera = PiCamera()
    camera.resolution = (640, 480)
    camera.framerate = 32
    rawCapture = PiRGBArray(camera, size=(640, 480))

    # allow the camera to warmup
    time.sleep(0.1)
Next, take images from the stream, perform detection on them and visualize the results:
# capture frames from the camera
for frame in camera.capture_continuous(rawCapture, format="bgr",
use_video_port=True):
t1 = cv2.getTickCount()

# grab the raw NumPy array representing the image, then initialize the timestamp
# and occupied/unoccupied text
image = frame.array

result = predictor.detect(image)

for obj in result:
logger.info('coordinates: {} {}. class: "{}". confidence: {:.2f}'.
format(obj[0], obj[1], obj[3], obj[2]))

cv2.rectangle(image, obj[0], obj[1], (0, 255, 0), 2)
cv2.putText(image, '{}: {:.2f}'.format(obj[3], obj[2]),
(obj[0][0], obj[0][1] - 5),
cv2.FONT_HERSHEY_PLAIN, 1, (0, 255, 0), 2)


# show the frame
cv2.imshow("Stream", image)
key = cv2.waitKey(1) & 0xFF
All the above code is available on Github.
Summary
We ran both models and got these results:
- YOLO tiny – 0.32 average FPS;
- SSD MobileNet Light – 1.02 average FPS.
So looking at these results, we can state that we can use a mobile detector with SSD MobileNet for real-life simple pedestrian tracking or for house security systems that can detect cats on your lawn. Or another case where sizes and power usage are more critical, and 1 FPS is sufficient.
Also, we tried to use the MXNet framework, but we had troubles with ../libmxnet.so on Raspberry Pi during module importing.
Below you can find the visualization of obtained results:
Read more about object detection on NVIDIA Jetson TX2 and how we tried to optimize an object detection model and improve performance with TensorFlow Lite.

