Object Detection on NVIDIA Jetson TX2

Aleksandr Dolgaryev
CTO
In recent years, embedded systems started gaining popularity in the AI field. Because the AI and deep learning revolution move from the software field to hardware. An embedded system on a plug-in card with processor, memory, power supply, and external interfaces. Since the embedded system is dedicated to specific tasks, design engineers can optimize it to reduce the size and cost of the product and increase the reliability and performance. They are commonly found in consumer, cooking, industrial, automotive, medical, commercial and military applications.
-
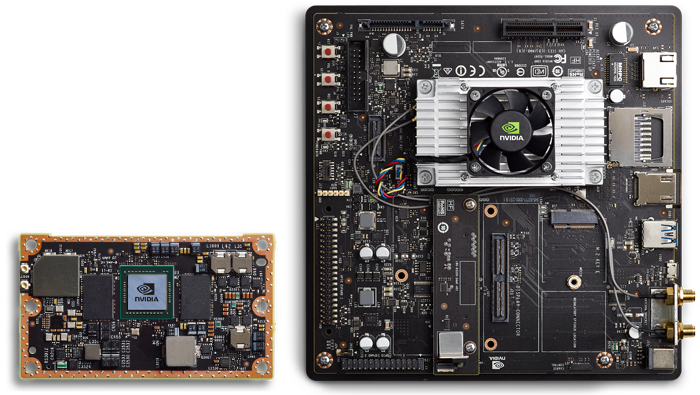
NVIDIA Jetson TX2
One of the most interesting devices in this area is the NVIDIA Jetson TX2. It’s the second generation of NVIDIA embedded devices. Jetson TX2 is an embedded system-on-module (SoM) with dual-core NVIDIA Denver2 + quad-core ARM Cortex-A57, 8GB 128-bit LPDDR4 and integrated 256-core Pascal GPU. Useful for deploying computer vision and deep learning, Jetson TX2 runs Linux and provides greater than 1 TFLOPS of FP16 compute performance in less than 7.5 watts of power.
-
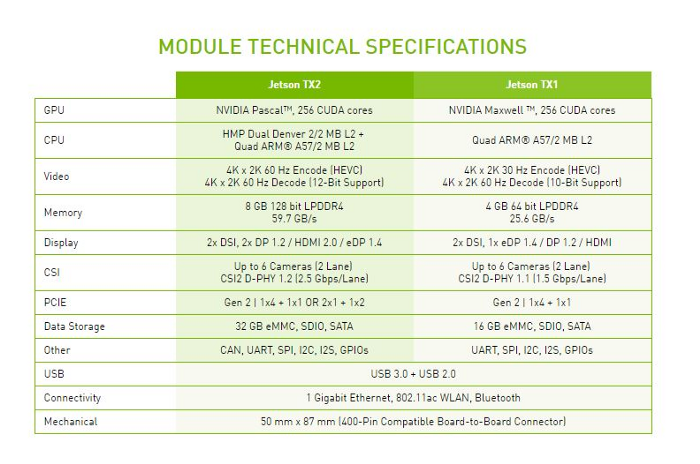
Jetson’s technical specifications
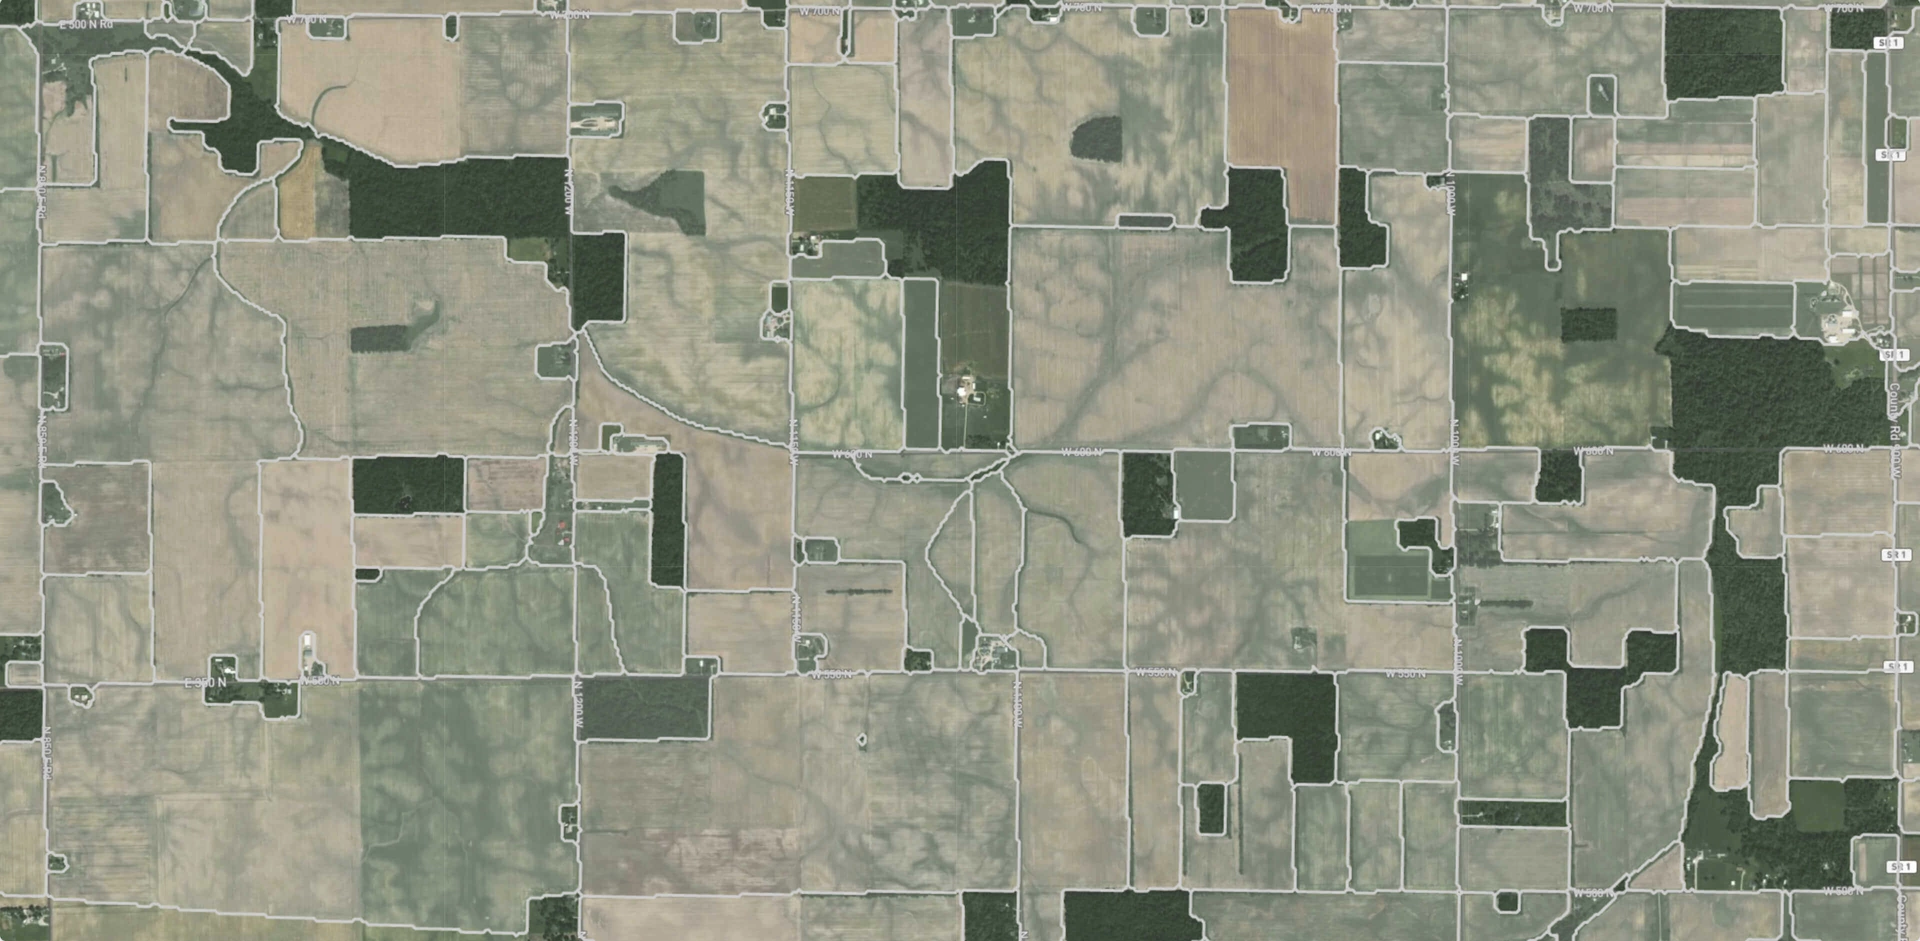
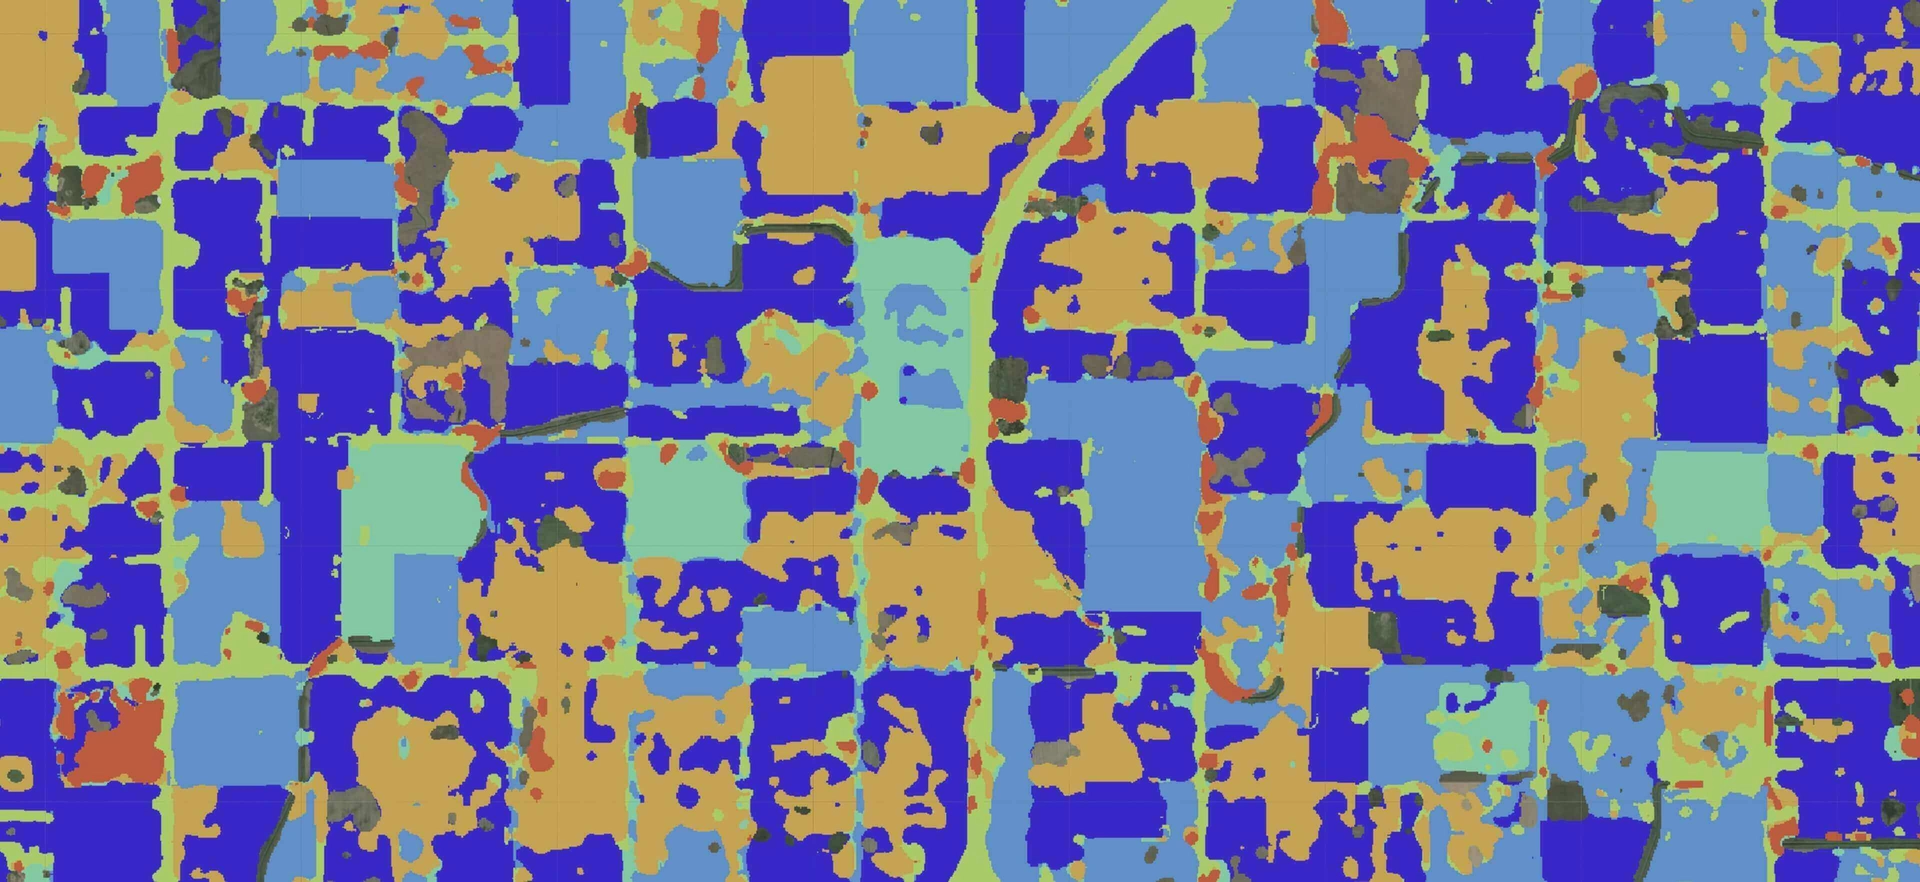
In this article, we demonstrate and evaluate a method to perform real-time object detection using the SSD Lite MobileNet V2 object detection algorithm running on an NVIDIA Jetson TX2.
Installing Jetpack
First, let’s install NVIDIA JetPack. NVIDIA JetPack SDK is the most comprehensive solution for building AI applications. Use the JetPack installer to flash your Jetson Developer Kit with the latest OS image, install developer tools for both host PC and the Developer Kit, and install libraries and APIs, samples, and documentation needed to jumpstart your development environment. The most recent version at the time of writing this article is JetPack 4.1.1.
For the most part, installation is easy. From an Ubuntu 16.04 or Ubuntu 18.04 PC host computer, you simply download JetPack from the NVIDIA JetPack web page(you’ll have to sign in with your developer account to download JetPack) and follow the instructions in the setup guide.
Installing TensorFlow, TensoRT, and OpenCV
TensorFlow is one of the most popular deep learning frameworks today. NVIDIA® TensorRT™ is a deep learning platform that optimizes neural network models and speeds up inference across all kinds of GPU-accelerated platforms running in data centers, embedded and automotive devices. TensorFlow integrates nicely with TensorRT, which seems a natural fit, particularly as NVIDIA provides platforms well-suited to accelerate TensorFlow. This enables TensorFlow users to have extremely high inference performance and a near-transparent workflow when using TensorRT.
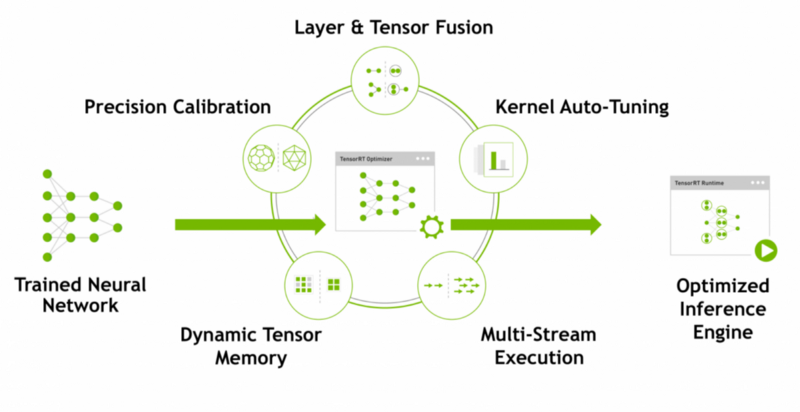
Adding TensorRT to the TensorFlow inference workflow involves an additional step, as shown in Figure 3. In this step (highlighted in green), TensorRT builds an optimized inference graph from a frozen TensorFlow graph.
Throughout this article, we will use Python 3. Let’s install TensorFlow and TensorRT on the device. You can find good instructions in NVIDIA TensorFlow/TensorRT Models on the Jetson repository. But first, you should install python3-dev and libfreetype6-dev packages. They may solve some problems with matplotlib installation:
sudo apt-get update
sudo apt-get upgrade
sudo apt-get install libfreetype6-dev python3-dev
Also, we recommend installing the last version of TensorFlow, currently, it is 1.10.1.
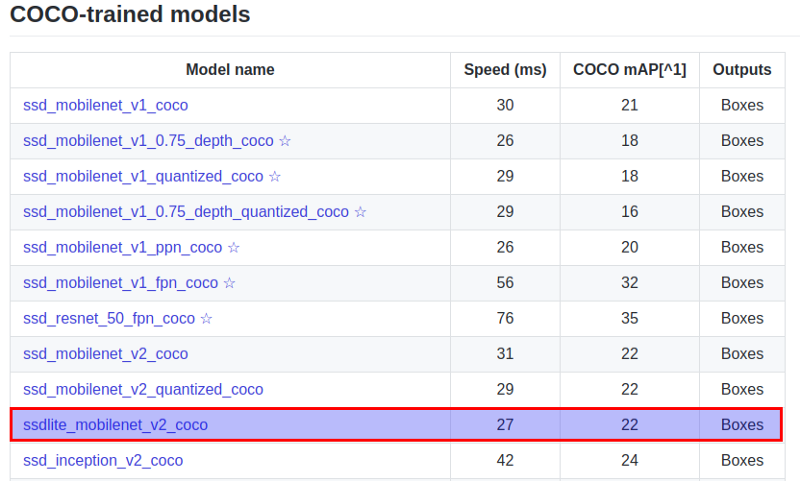
After installing TensorRT we had a problem with the jupyter example. Since the example uses a ssd_inception_v2 model which tries to allocate a lot of GPU memory, the session run process gets killed by the system. To resolve this problem we changed the model to SSD Lite MobileNet v2 from TensorFlow Model ZOO. The model zoo is Google’s collection of pre-trained object detection models that have various levels of processing speed and accuracy.

Though the model runs faster, it comes at a tradeoff of having lower accuracy. Download the SSDLite-MobileNet model and unpack it and set a path to model’s files in the jupyter notebook.
-
Model ZOO
Now build and install openCV. For this better use this repository. But after installing you should make one more step. Adrian Rosebrock describes it in his blog:
OpenCV + Python bindings should be installed in /usr/local/lib/python3.5/site-packages. But be careful when compiling OpenCV 3 bindings for Python 3+, the output .so file is sometimes named cv2.cpython-35m-arm-linux-gnueabihf.so (or something similar) instead of cv2.so (like in the Python 2.7 bindings). Perhaps it’s a bug in the CMake script. In case this happens, just rename the file to cv2.so.
It’s an easy fix. All we need to do is the following:
cd /usr/local/lib/python3.5/site-packages/
sudo mv cv2.cpython-35m-arm-linux-gnueabihf.so cv2.so
Run Tensorflow graph
All code below is available on GitHub.
First, define an abstract class for object detectors:
from abc import ABC, abstractmethod


class ObjectDetector(ABC):
    @abstractmethod
    def detect(self, frame, threshold=0.0):
        Pass
Next, implement the interface for TensorFlow model, we used code from the object detection API.
Now let’s implement functions for video streaming from jetson onboard camera:
def open_cam_onboard(width, height):
    # On versions of L4T prior to 28.1, add 'flip-method=2' into gst_str
    gst_str = ('nvcamerasrc ! '
               'video/x-raw(memory:NVMM), '
               'width=(int)2592, height=(int)1458, '
               'format=(string)I420, framerate=(fraction)30/1 ! '
               'nvvidconv ! '
               'video/x-raw, width=(int){}, height=(int){}, '
               'format=(string)BGRx ! '
               'videoconvert ! appsink').format(width, height)
    return cv2.VideoCapture(gst_str, cv2.CAP_GSTREAMER)
And use it:
predictor = ObjectDetector(args.graph_path)
cap = open_cam_onboard(640, 480)
while (cap.isOpened()):
  ret, frame = cap.read()
  result = predictor.detect(frame)
So with SSD Lite TensorFlow model, we have around 4.2 FPS.

Run TensorFlow Lite optimized graph
TensorFlow Lite is the official solution for running machine learning models on mobile and embedded devices. It enables on‑device machine learning inference with low latency and a small binary size on Android, iOS, etc. TensorFlow Lite uses many techniques for this such as quantized kernels that allow smaller and faster (fixed-point math) models.
How setup environment and convert graph with TensorFlow Lite you can read in the previous article. Also, you can download a lite graph from here(detect.tflite).
We need to make another detection class work with an optimized graph. The code is available here.
SSD Lite model with TensorFlow Lite optimization has 4.7 FPS on average.
Run TensorRT optimized graph
You can skip this part too since we’ve made a pre-trained model available here (ssdlite_inception_v2_coco_trt.pb).
Let’s consider a more detailed example.
We have already downloaded a pre-trained SSD Lite model. And we should build a frozen graph:
from tf_trt_models.detection import build_detection_graph

frozen_graph, input_names, output_names = build_detection_graph(
    config=config_path,  # path to model’s pipeline.config file
    checkpoint=checkpoint_path,  # path to model.ckpt file
    score_threshold=0.3,
    batch_size=1
)
Next, build a TensorRT/Jetson compatible graph and save it:
import tensorflow.contrib.tensorrt as trt

trt_graph = trt.create_inference_graph(
    input_graph_def=frozen_graph,
    outputs=output_names,
    max_batch_size=1,
    max_workspace_size_bytes=1 << 25,
    precision_mode='FP16',
    minimum_segment_size=50
)

with open('./data/ssd_inception_v2_coco_trt.pb', 'wb') as f:
    f.write(trt_graph.SerializeToString())
And we can use this optimized graph like a standard frozen graph.
After TensorRT optimization we have 11.5 FPS


Summary
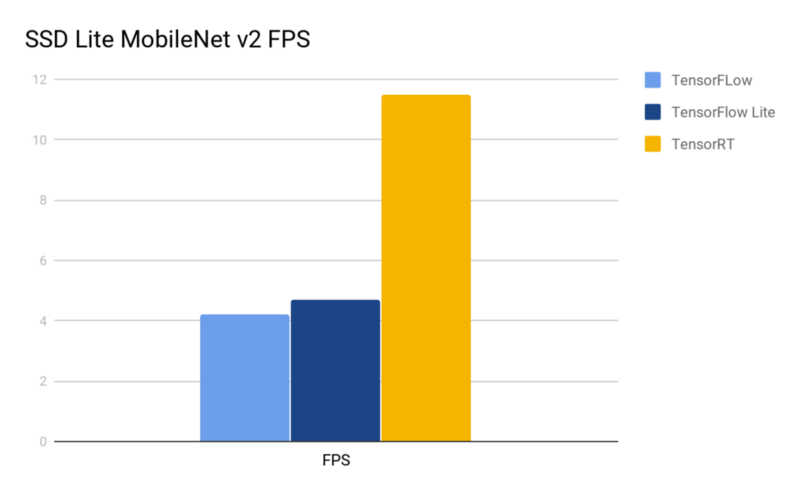
After our test runs we have the following performance results:
- Standard TensorFlow graph — 4.2 FPS;
- TensorFlow Lite optimized graph — 4.8 FPS;
- TensorRT optimized graph — 11.4 FPS.
-
Models’ comparison
As you can see above, TensorRT optimization almost triples out the model’s performance. And if we can process images in batches, performance may grow even higher. It seems that TensorFlow Lite optimization has a small impact on Jetson, this might be due to it not being optimized for GPU use. TensorRT has only one con: not all models could be optimized with it.
All in all, NVIDIA Jetson TX2 + TensorRT is a relatively inexpensive, compact and productive machine, that could be used for real-time object detection.
Contact us if you have questions or ideas, and follow our blog updates.