Mobile object detector with TensorFlow Lite

Aleksandr Dolgaryev
CTO
This article is a logical continuation of the previous article “Object detection with Raspberry Pi and Python”. Today we try to optimize an object detection model and improve performance with TensorFlow Lite.
TensorFlow Lite is the official solution for running machine learning models on mobile and embedded devices. It enables on‑device machine learning inference with low latency and small binary size on Android, iOS, Raspberry Pi and etc. TensorFlow Lite uses many techniques for this, such as quantized kernels that allow smaller and faster (fixed-point math) models.
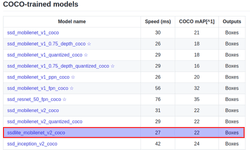
We will optimize the SSD Lite MobileNet v2 model for a proper comparison.
You can skip the next two parts by using the provided docker image with TensorFlow 1.9 and object detection API pre-installed:
docker pull c1emenza/tf-1.9-object-detection-api:v1Installing Tensorflow
If you don’t have TensorFlow installed on a host machine, install TensorFlow. You can use the official instructions. Or install TensorFlow from the source using Bazel following the instructions here. Also, pay attention to the TF version because TF is not backward compatible. And if build model with 1.11 version, then the model may not work on 1.9 version. So better use 1.9 version for TF Lite optimization.
Installing TensorFlow Object Detection
If you are not familiar with TensorFlow Object Detection, welcome! To install it, you can follow the instructions from the official git repository.
Then, download the SSDLite-MobileNet model from the TensorFlow detection model zoo and unpack it.

Convert a model with TensorFlow Lite
You can skip this part too, because we’ve made a pre-trained model available here.
To make these commands easier to run, let’s set up some environment variables:
export CONFIG_FILE=PATH_TO_BE_CONFIGURED/pipeline.config
export exportCHECKPOINT_PATH=PATH_TO_BE_CONFIGURED/model.ckpt
export exportOUTPUT_DIR=/tmp/tflite
We start with a checkpoint and get a TensorFlow frozen graph with compatible ops that we can use with TensorFlow Lite. So, you already have to install TensorFlow and Object Detection python libraries. Then to get the frozen graph, run the export_tflite_ssd_graph.py script from the models/research directory with this command:
object_detection/export_tflite_ssd_graph.py \
 — pipeline_config_path=$CONFIG_FILE \
 — trained_checkpoint_prefix=$CHECKPOINT_PATH \
 — output_directory=$OUTPUT_DIR \
 — add_postprocessing_op=true
In the /tmp/tflite directory, you should now see two files: tflite_graph.pband tflite_graph.pbtxt. Note that the add_postprocessing flag enables the model to take advantage of a custom-optimized detection post-processing operation which can be thought of as a replacement for tf.image.non_max_suppression. Make sure not to confuse export_tflite_ssd_graph with export_inference_graph in the same directory. Both scripts output frozen graphs: export_tflite_ssd_graph will output the frozen graph that we can input to TensorFlow Lite directly and is the one we’ll be using.
Next, we’ll use TensorFlow Lite to get the optimized model by using TOCO, the TensorFlow Lite Optimizing Converter. This will convert the resulting frozen graph (tflite_graph.pb) to the TensorFlow Lite flatbuffer format (detect.tflite) via the following command. or a floating-point model, run this from the tensorflow/ directory:
bazel run -c opt tensorflow/lite/toco:toco — \
 — input_file=$OUTPUT_DIR/tflite_graph.pb \
 — output_file=$OUTPUT_DIR/detect.tflite \
 — input_shapes=1,300,300,3 \
 — input_arrays=normalized_input_image_tensor \
 — output_arrays=’TFLite_Detection_PostProcess’,’TFLite_Detection_PostProcess:1',
’TFLite_Detection_PostProcess:2',’TFLite_Detection_PostProcess:3' \
 — inference_type=FLOAT \
 — allow_custom_ops
Running our model on Raspberry Pi
To run our TensorFlow Lite model on a device, we will need to set up TensorFlow and openCV. You can read about this process here.
Now, let’s implement a class for working with “lite” graph:
import numpy as np
import tensorflow as tf
import cv2

# import calass and function from TF object detection API
from object_detector_detection_api import ObjectDetectorDetectionAPI, \
    PATH_TO_LABELS, NUM_CLASSES


class ObjectDetectorLite(ObjectDetectorDetectionAPI):
    def __init__(self, model_path='detect.tflite'):
        """
            Builds Tensorflow graph, load model and labels
        """

        # Load lebel_map
        self._load_label(PATH_TO_LABELS, NUM_CLASSES, use_disp_name=True)

        # Define lite graph and Load Tensorflow Lite model into memory
        self.interpreter = tf.contrib.lite.Interpreter(
            model_path=model_path)
        self.interpreter.allocate_tensors()
        self.input_details = self.interpreter.get_input_details()
        self.output_details = self.interpreter.get_output_details()

    def detect(self, image, threshold=0.1):
        """
            Predicts person in frame with threshold level of confidence
            Returns list with top-left, bottom-right coordinates and list with labels,
confidence in %
        """

        # Resize and normalize image for network input
        frame = cv2.resize(image, (300, 300))
        frame = np.expand_dims(frame, axis=0)
        frame = (2.0 / 255.0) * frame - 1.0
        frame = frame.astype('float32')

        # run model
        self.interpreter.set_tensor(self.input_details[0]['index'], frame)
        self.interpreter.invoke()

        # get results
        boxes = self.interpreter.get_tensor(
            self.output_details[0]['index'])
        classes = self.interpreter.get_tensor(
            self.output_details[1]['index'])
        scores = self.interpreter.get_tensor(
            self.output_details[2]['index'])
        num = self.interpreter.get_tensor(
            self.output_details[3]['index'])

        # Find detected boxes coordinates
        return self._boxes_coordinates(image,
                            np.squeeze(boxes[0]),
                            np.squeeze(classes[0]+1).astype(np.int32),
                            np.squeeze(scores[0]),
                            min_score_thresh=threshold)
All the above code is available on GitHub.
Summary
If we run both TFLite and non-TFLite versions of the model, we can observe the following:
- SSD MobileNet Light — 1.02 avg FPS;
- SSD MobileNet Light with TensorFlow Lite — 1.73 avg FPS.
Looking at the results we can say that TensorFlow Lite gives a performance boost of about 70%, which is quite impressive for such a simple operation.
Read more: Running your Deep Learning models in a browser using Tensorflow.js and ONNX.js