Running your Deep Learning models in a browser using Tensorflow.js and ONNX.js

Aleksandr Dolgaryev
CTO
Today we will discuss how to launch semantic segmentation and style transfer models in your browser using Tensorflow.js and ONNX.js.
The purpose of this article is to determine if relatively large models can be used in a browser on your PC and mobile device.
Tensorflow.js
TensorFlow.js is a library for machine learning in JavaScript. It allows us to run existing models or train your own in the browser. The current version of Tensorflow.js, 1.2.7, supports quite a wide range of operations, while most of them are almost the same as in Tensorflow, others such as tf.browser.fromPixels can give you the power to create a tf.Tensor from an HTML element, which is pretty useful. Unfortunately, I had to go with a lower version of tf.js — 0.15.1 to import my frozen model (starting from 1.x tf.js converter doesn’t support converting frozen models into tf.js format).
ONNX.js
ONNX.js is a Javascript library for running ONNX models in browsers and on Node.js. ONNX format (Open Neural Network Exchange) provides an open-source format for AI models, both deep learning and traditional ML. This means that you should be able to convert most of the deep learning models to this format. This functionality is an amazing opportunity for model exchangeability and reusability, but… there is one issue. ONNX format is relatively new and is still not up to date with all the newest changes in the mainstream deep learning frameworks. This can cause incompatibilities due to missing operations or differences in implementation.
Semantic segmentation
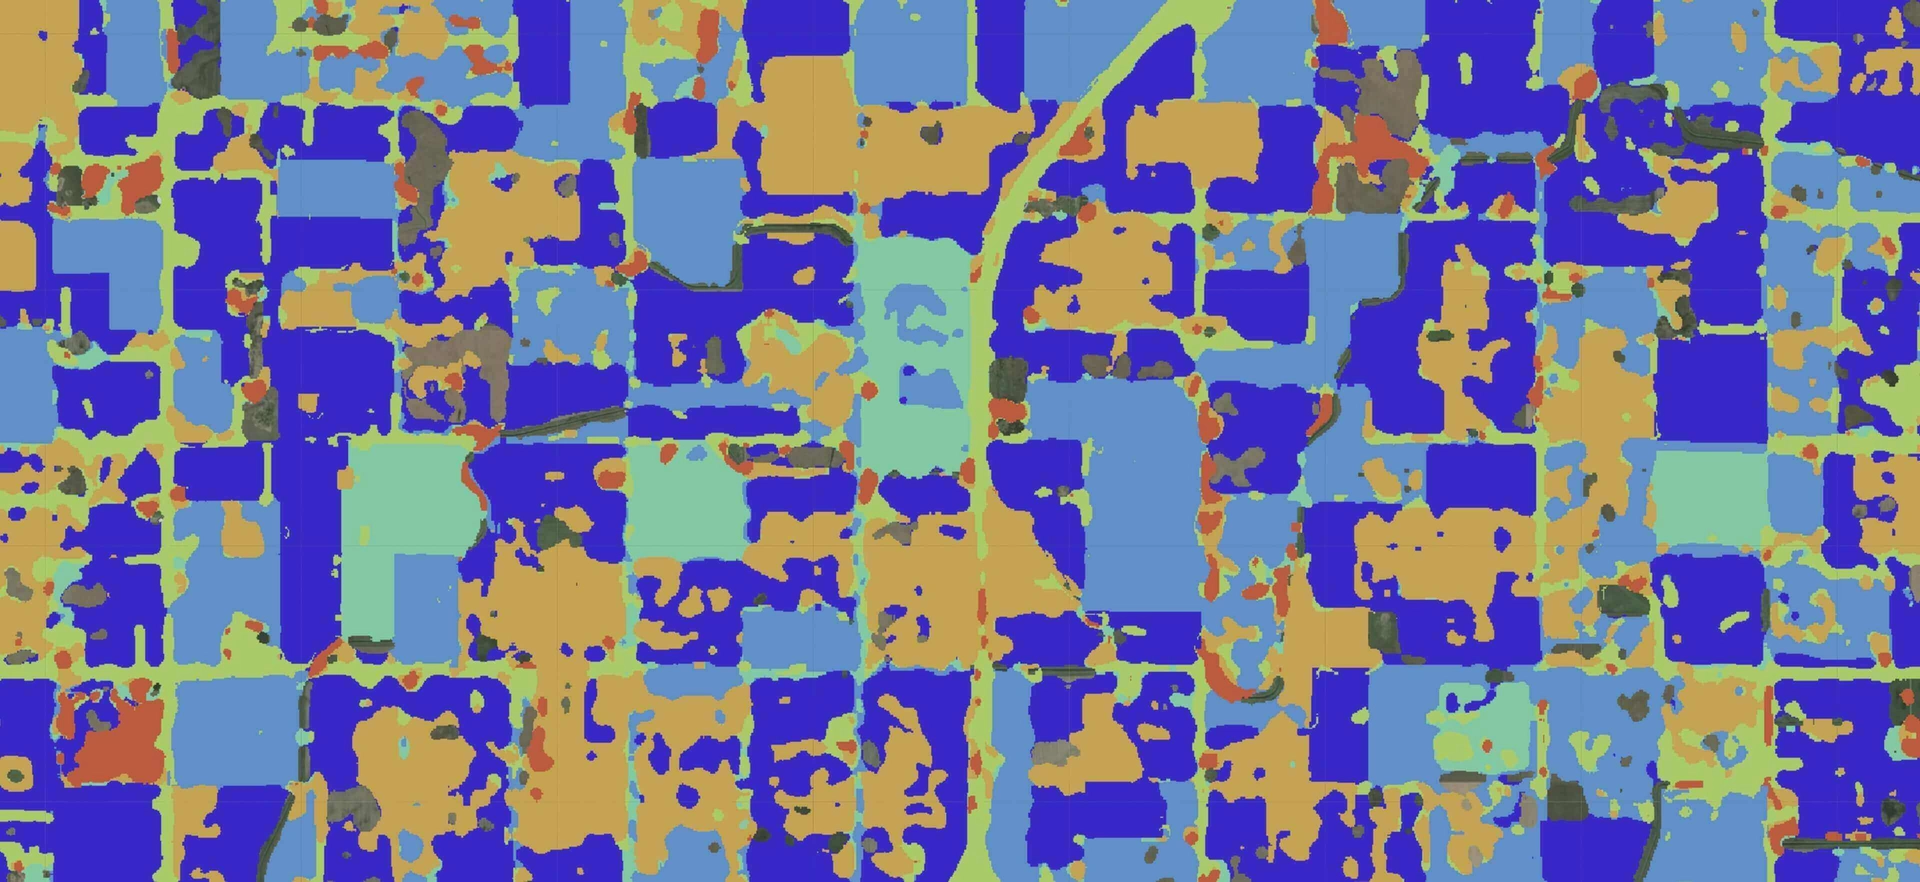
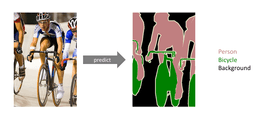
Semantic Segmentation is a classic Computer Vision problem that involves taking as input some raw data (eg., 2D images) and converting them into a mask with regions of interest highlighted. Many use the term full-pixel semantic segmentation, where each pixel in an image is assigned a classID depending on which object of interest it belongs to.

I chose to go with Fast-SCNN architecture as a semantic segmentation model, because “it yields a mean intersection over union (mIoU) of 68.0% at 123.5 frames per second (fps) on a modern GPU (Nvidia Titan Xp (Pascal)) using full (1024×2048px) resolution applied on Cityscapes” according to this article. 120 fps at such a high resolution is an amazing result, which means that the network should be pretty light-weight, which, as it turns out, it is. It uses some of the techniques for creating fast semantic segmentation models such as depthwise separable convolutions and two-branch methods to improve model inference time while sustaining the prediction accuracy.
Style transfer
Let’s define a style transfer as a process of modifying the style of an image while still preserving its content.
Given an input image and a style image, we can compute an output image with the original content but a new style. This is how input, style and output images might look combined.


At first, I tried using this Pytorch implementation of style transfer and converted it into ONNX format. This implementation of style transfer replaces some of the Pytorch operations, such as reflection pad and interpolation, with a sequence of basic operations because ONNX.js currently doesn’t support these operations. The problem occurred when I tried launching this model on a mobile browser and it didn’t work, which led me to change this model to Tensorflow implementation of different style transfer architecture and run everything in tf.js. By the way, tf.js also currently doesn’t implement a reflection pad, which is why I replaced it with a regular zero pad, which tf.js supports.
Tf.js conversion
All the models were converted in Python with tf.js version 0.8.6 using this guide:
tensorflowjs_converter --input_format keras \
                       path/to/my_model.h5 \
                       path/to/tfjs_target_dir

tensorflowjs_converter --input_format frozen_model \
                       path/to/my_model.pb \
                       path/to/tfjs_target_dir
Some code
While converting Fast-SCNN into tf.js format and trying to run it, I found out that Lambda layer, which was used as a wrapper for tf.image.resize_images, should be replaced because it is a native Python implementation (which makes sense) and I wrote custom layer Lambda in Javascript, which would simply call tf.js resizeBilinear method like this:
import * as tf from '@tensorflow/tfjs';

class Lambda extends tf.layers.Layer {
  constructor() {
    super({});
    this.supportsMasking = true;
    this.constOutputShape = [256, 256]
  }

  computeOutputShape(inputShape) {
    return [inputShape[0], this.constOutputShape[0], this.constOutputShape[1], inputShape[3]]
  }

  call(inputs, kwargs) {
    let input = inputs;
    if (Array.isArray(input)) {
      input = input[0];
    }
    return tf.image.resizeBilinear(input, this.constOutputShape);
  }

  static get className() {
    return 'Lambda';
  }
}
tf.serialization.registerClass(Lambda);
Let’s get through the main workflow of launching these two models together. First, we should get our input:
const image = tf.tidy(() => {
      if (!(srcImgData instanceof tf.Tensor)) {
        var frame = tf.browser.fromPixels(this.hiddenCanvas);
      }
      return frame;
});
Then we resize the image to model’s input size, normalize, predict and resize back to the size of our initial image:
const segmentationInputSize = [256, 256]
const segmentationInput = tf.image.resizeBilinear(image, segmentationInputSize).expandDims(0).div(255.0);
const segmentationMask = segmentationModel.predict(segmentationInput);
const resizedSegmentationMask = tf.image.resizeBilinear(segmentationMask, [this.hiddenCanvas.height, this.hiddenCanvas.width]).squeeze()
Threshold our mask:
const threshold = 0.5
const thresholds = tf.fill([this.hiddenCanvas.height, this.hiddenCanvas.width], threshold)
const thresholdedSegmentationMask = resizedSegmentationMask.greater(thresholds)
The process of running style transfer on top of semantic segmentation is pretty similar to the one described above. However, we should blend our style transfer output with source image data according to our segmentation mask:
var srcImgData = canvasContext.getImageData(0, 0, this.hiddenCanvas.width, this.hiddenCanvas.height);
const arrMask = thresholdedSegmentationMask.dataSync()
const resizedStyleTransferArr = resizedStyleTransfer.dataSync()
for (var i = 0; i < arrMask.length; i++) {
  if (arrMask[i] === 1) {
    srcImgData.data[i * 4] = resizedStyleTransferArr[i * 3];
    srcImgData.data[i * 4 + 1] = resizedStyleTransferArr[i * 3 + 1];
    srcImgData.data[i * 4 + 2] = resizedStyleTransferArr[i * 3 + 2];
  }
}
var resultCanvasContext = this.resultCanvas.getContext('2d');
resultCanvasContext.putImageData(srcImgData, 0, 0);
In the end, we recursively call our function to process the next frame from the video cam:
laptopSegmentationalStyleTransfer = (styleTransferModel, segmentationModel) => {
    //functionality described before
    requestAnimationFrame(() => {
this.laptopSegmentationalStyleTransfer(styleTransferModel, segmentationModel);
    });
Results
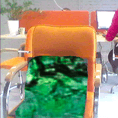
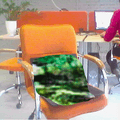
Here we segment laptops and apply the style transfer to them.


Summary
If we run our models in the browser, we get the following results:
1.3 fps using WebGL backend: 141 ms — segmentation time (with full pre/post-processing), 576 ms — style transfer time on one iteration (with full pre/post-processing), the rest of the time is taken by getting/putting images into the canvas.
Hopefully, this article gave you some insight into the process of deploying models in a browser and you found out about the struggles you might bump into during development. Don’t forget to subscribe to our blog updates!
Read more: Tracking Experiments with MLflow.